Nail Art Brush
Nail Art Brush: Introduction
The nail art brush, which we use to create the designs and shapes on the nails and create detailed art, should be thanks to different brushes. This is the most enjoyable and fun activity. With this activity, you can improve your nail art skills.
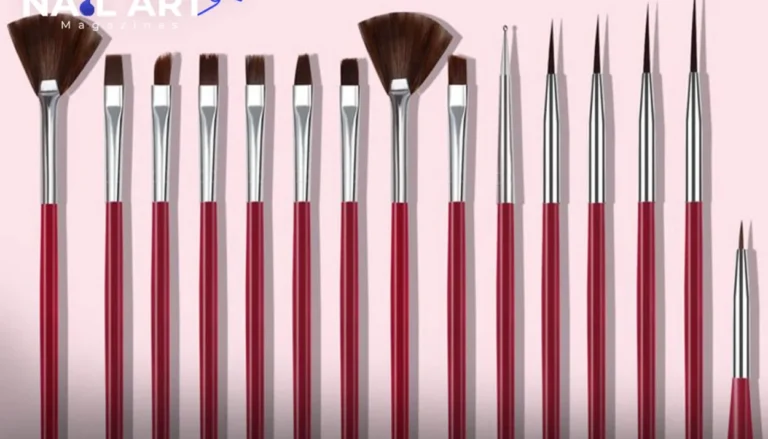
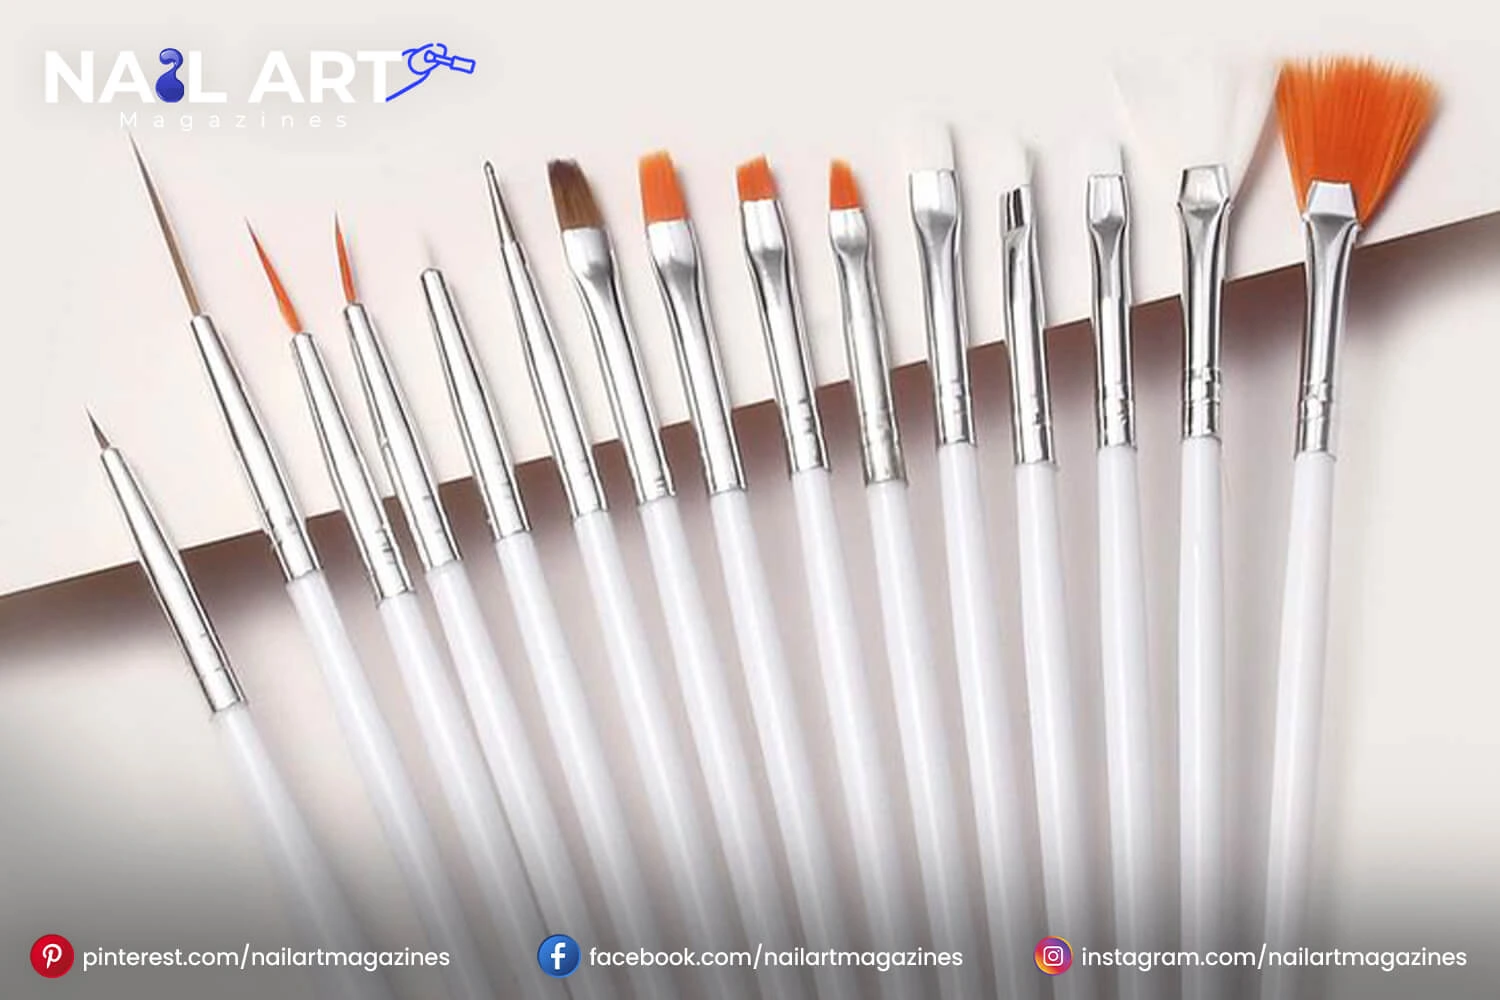
Nail art brushes, which are preferred, are for both individual and professional use. The brushes contain thin and short tips, a thin and long angled brush, a detailed brush, and a fan brush, which can be used easily with brand-new designs.
What are the types of Nail Art Brush?
Each type of brush has a different purpose: to create unique designs and a professional look.
Striping brush
This brush has long and thin bristles, which are excellent for strips, straight lines, and geometric patterns. This brush is perfect for tricky line designs with other brushes.
Detailing brush
This brush is used for delicate and detailed work, and its tips are fine and thin. We can draw flowers and hearts, draw lines and add dotting and tiny accents.
Fan brush
This brush has a widely spaced fan brush to help give it a gradient and ombre look. Great for glitter dusting and blending multiple colours.
Angled brush
These brushes work well for creating angled designs and help create ombre transitions, and are best for French tips and for making one stroke.
Flat brush
Flat brushes are wide and flat tips used for filling larger areas. It also helps with border strokes and petals in floral designs.
Dotting tool
It’s not a brush, but it’s essential for creating designs. This tool is best for polka dots, any dotting pattern and a starting base for floral designs.

How to use Nail Art Brush effectively?
For the ombre gradient effect
For an ombre gradient look, a fan brush can blend colour smoothly. Start with a lighter colour, then add the dark colour, and for blending, use a fan brush for the ombre result.
For clean French tips
An angular brush is perfect for achieving smooth and sharp French tips.
For perfect lines and strips
To create thin lines and strips, and for longer lines, use striping tape, and striping brushes are best. The trick is maintaining the stroke from one end to another without lifting the brush.
For detailed designs
A detailed brush will help you create detailed designs like animal prints. If you want accuracy in your design, then practice makes you perfect.
How can you maintain the cleaning of your Nail Art Brush?
Proper maintenance and cleaning of nail art brushes are essential to keep them in good condition.
Cleaning your Nail Art Brush
For regular polish
- Take a small amount of acetone or nail polish remover. Acetone can dry and damage the bristle when you use it for a long time.
- Dip the bristles in the nail remover using a paper towel, and clean them until the polish is removed.
- Now rinse the brush with simple water after cleaning.
For gel polish
- Use a unique gel polish cleanser; otherwise, acetone and nail remover can weaken the bristle.
- You can dip it in gel cleanser. for cleaning, you can use wipes or a paper towel.
- You have to avoid leaving the gel on the bristle. It can be hard and ruin the brush.
For acrylic paint
- After using acrylic paint, clean the brush with warm water immediately. Acrylic paint can dry quickly.
- If the paint is dry, then use a small amount of cleaner or soap solution.
Shape the bristle
After cleaning, it’s essential to shape the bristle. Reshape the bristles with your finger and restore them to their original shape.
Storage tip
- Many nail art brushes come with caps and cases. You should protect the brushes from dust and damage.
- Heat can dry out the natural bristle, so keep them cool and dry.

The final tip for a long-lasting brush
Take a little time daily to clean and care for your brushes, and then you will see a big difference in your brush. How well they perform. If you follow these steps, it will help you to keep your brushes soft and in shape.
Tips for beginners using Nail Art Brushes
If you are a beginner, then using the brushes feels challenging. But with practice and following the tips, you can easily handle the brush.
- You can start with basic designs to build your confidence, like polka dots. You can create polka dots with a dotting tool. You can try straight single lines and geometric shapes or floral designs.
- You can create strips on your nails. With practice, you create perfect lines.
- Hold the brush at a comfortable angle, and then you can better control it.
- Take a deep breath and relax to make each stroke.
- Take a small amount of polish because too much paint can thicken your lines and smudge the design.
- Clean your brushes after each use if you switching colours. Clean it with acetone-free nail polish remover.
What is the popular nail art trend for using brushes?
Floral pattern
The floral patterns always remain a favourite. With a detailing brush, you can use floral leaves and vines with soft colours and create a daisy shape with dotting tools.
Brush needed: detailing brush and dotting tools
Marble effect
Marble nails look natural with a marble effect and swirling colours. You can achieve this look by blending with a flat and angled brush; blended lines give the impression of marble veins.
Brush needed: flat and angled brush
Animals print
Animal print, especially zebra and leopard print, is trending. You can create zebra,s stripes and leopard spots with nail art brushes. This design works well as an accent nail.
Brush needed: a detailing brush
French tips with a twist
French tips have evolved from the traditional white strips. You can create rainbow tips, and colourful tips are popular designs.
Brush needed: angled brush

Conclusion
A set of quality nail art brushes gives you endless possibilities for creativity. You can start with basic designs, and practising regularly will help you to create your desired nail art. You can transfer any manicure into a creative work art with the right brushes and techniques.