Beach Design Nail Art
Beach Design Nail Art: Introduction
Beach nail art uses bright colors to resemble the beach and ocean. It is a popular trend and a fun way to feel like you are on a beach vacation. You can create patterns and hand-paint things like seashells, palm trees, and starfish.
There are many beach design nail art options. The color palette for beach design nail art, like pink, blue, white, and green, gives the natural beauty of the seaside a shiny effect, which is essential when wearing this style.

Trendy Beach Design Nail Art
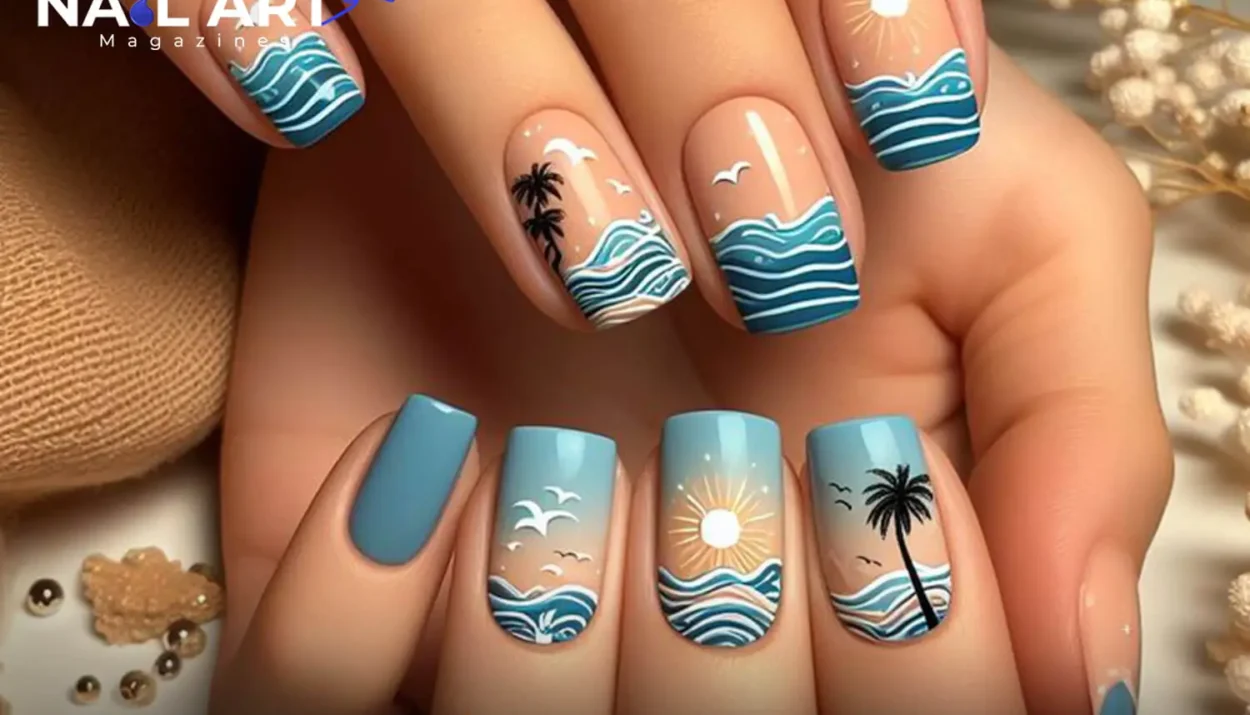
Ocean Waves
Ocean Waves nail art brings the beauty of the sea to your nails. You can create blue and white waves with glitter to resemble sparkling water.
How to Create this Look
- Use light and dark polish to create an ombre effect
- Now, use white polish and create wavy lines for the impact of the ocean.
- Now apply a top coat for shine.
Seashell and Starfish
Combining a seashell and starfish gives a delightful, complete beach design nail art effect.
Creative Method Seashell
- Apply a base pedestal or neutral color to resemble sand or water.
- Create semi-circle curved lines for seashell texture in the middle of the nail.
- Add glitter polish and rhinestones for extra detail.
Starfish
- Start with a dot and extend five lines outward.
- Thick the lines slightly for a realistic starfish look.
Beach Sand
This design depends on colors to create a beach sand effect with the texture of golden sand.
Steps for Beach Sand
- Choose nude and light colors
- Now sprinkling gold glitter on wet polish
- Gently tap the extra glitter and wait for the polish to dry.
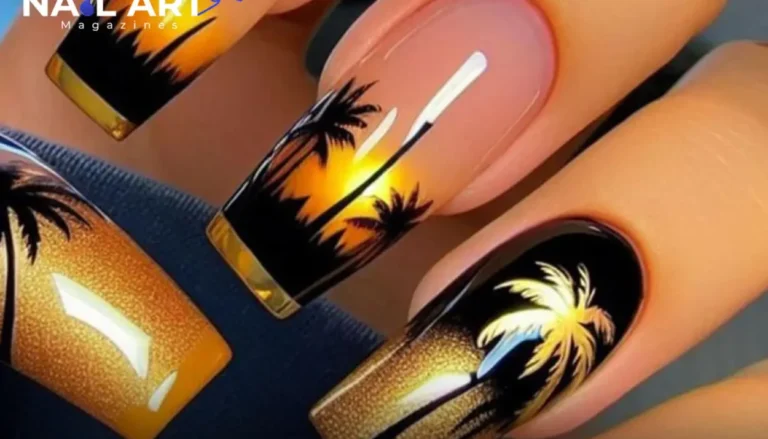
Sunset Gradient Look
The sunset gradient look on nails evokes the beauty of a sunset, giving a warm and vibrant effect. It is perfect for vacation and beach design nail art.
Application Tips
- Create a gradient look on your nails, starting from the cuticles and moving to the tips.
- With a dotting tool and brushes, add a fluffy white cloud.
- Now, apply a top coat for a smooth look.
Palm Trees
Palm trees are a prevalent beach theme. It looks beautiful with a sunset and ocean background.
Applying Tips
- Apply a base coat of light blue and white for a bright theme.
- Draw curved lines outward like a fan to create the leaves.
- Add short and thin strokes.
- Seal the design for longevity.
Which Tools will Help you Create Beach Design Nail Art?
Hand Painting
Hand-painting nail art is a creative, fun, and exciting technique that helps create intricate and personal designs. With this method, artists create different themes, such as palm trees, waves, starfish, shells, and sunsets.
Stamping
Stamping nail art gives you a professional look and creates intricate designs like shells or marine life quickly and easily. It will provide you with a wide variety of beach motifs. It’s a time-saving technique and a way to elevate your manicure.
3D Art and Embellishment
In Beach Designs, nail art and 3D embellishment will help you give your manicure a charming and glamorous look. You can add textures like pearls, rhinestones, or shells. You can use nail glue or UV gel to secure the 3D element.
Gradient Ombre Effect
An ombre gradient is the best technique for creating beach designs. It blends the shades of blue and white for beach nails. The gradient technique also helps you mix colors like yellow and orange for sunset creation.
Marble Techniques
The marble technique is one of the best for ocean flow. You can mix blue and white polish.

Which Colors are Perfect for Beach Design Nail Art?
Perfect color is essential because the right color can bring your design to life.
- Oceanic blue, like aqua, will reflect the sea tone, and navy blue will add depth and contrast like ocean waves.
- Sandy nude shades resemble the sand
- Gold will add a touch of sparkling effect.
- Yellow and orange reflect the sunlight, giving a bright and warm feeling.
- Green is perfect for palm trees.
- White is ideal for foam, waves, and shells.
Tips for Beach Design Nail Art
- Always choose the right colors from the color palette to create a beach look, such as aqua, sandy beige, coral, and gold for the seaside. White is the best for waves and foam.
- Clean and shape your nails. Apply a base coat for a smooth surface, and it will protect from staining.
- Add decorative elements like pearls, shells, starfish, and embellishments.
- You can give details with brushes and a stamping palette.
- Apply a top coat to seal the design and enhance the shine. For extra shine, use a glitter top coat over your nail paint.
- You can try different themes and techniques like sunset and underwater scenes.
Which Nail Shapes are Best for Beach Design Nail Art?
Nail shape is essential when creating beach designs; it will reflect your overall look and vibe. Here are some popular shapes that complement beach nail art designs.
Coffin Nails
This nail shape is perfect for intricate designs like sunsets, palm trees, and gradient effects. You can add embellishments like pearls or rhinestones.
Almond Nails
Almond nails are sleek and elegant. On this canvas, you can create ocean waves, but if you are going to hand-paint details like starfish, palm trees are best.
Stiletto Nails
They are pointed tips with bold and detailed designs. This design is perfect for an artistic look and integrating designs. If you want your design to pop, then use glitter.
Oval Shapes
This shape is a classic and balanced canvas for a simple and natural design. Small designs can be created, such as sand, sea, waves, and shells.

Conclusion
Beach design nail art is the best way to show creativity through simple and intricate designs using different techniques, tools, and practice. Practice will enhance your nail art skills and take your manicure to the next level. Beach designs are perfect for vacation nails, poolside, brightening your day, and bringing tropical vibes to your fingertips.