Best Nail Art Brushes
Nail Art Brushes: Introduction
Nail art brushes bring creativity and an elegant look to your life. You can create intricate designs, different patterns, and 3D textures with brushes and essential tools because different types of brushes have different purposes in the creativity of nail art. When you make a design, you must choose the right brush for good results.
Explore different Types of Nail Art Brushes and how to use them
Some nail art brushes, their uses, and how to maintain their cleanliness.
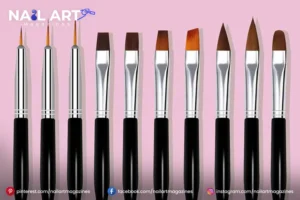
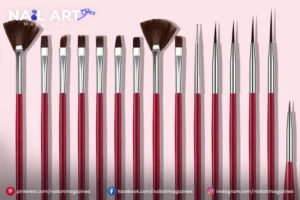
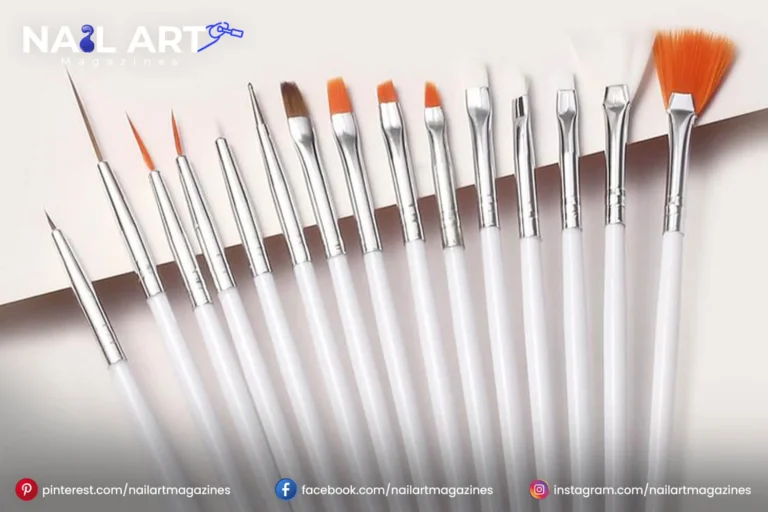
Liner brush
A liner brush is a thin nail art brush that draws straight lines with small details. It is fragile in size and length. With a liner brush, we can create leaves and abstract patterns. This brush is the ideal and perfect choice for acrylic polishes, and liner brush comes with a protective cap to keep its bristles soft and undamaged.
Striping brush
A striping brush is the best choice if you choose a design for plaid, geometric pattern, strips, or animal print. The longer the nail brush, the more you can mitigate any shakiness in your hand. Shorter brushes are better if you complete the fine detail.
Detailed brush
A detailed brush is an excellent nail art brush with pointed tips to create detailed designs. We can use it to create floral designs, add dotting, and add a tiny accent.
It is ideal for applying powder foundation in full coverage. Just dip the end of the bristle into your color and swipe across the nail to create a swish of color.
Angled nail art brush
If you want to create classy French tips, use an angel nail art brush. An angled brush is ideal for one-stroke designs. Angled brush is used to clean nail polish and other products from your skin after painting your nails. This brush is best for gel acrylic paints or even powder.
Clean up brush
The clean-up brush has soft bristles, which you can use to tidy up your nails’ edges and remove any extra product on your fingernails. The clean-up brush is a unique product. Its flat angle makes it perfect for use with our nail stamping kit.

How can you care and keep the original shape of your Nail Art Brushes?
Proper care is essential for your nail art brushes, which can extend their life, and they perform well.
Cleaning
When you have used any nail art brush, you should clean it with acetone, alcohol, or another type of brush cleaner. Different types of polish and the product used will determine the cleaner. You should avoid soaking the bristle for too long, as it can weaken the glue holding the bristle in place.
Storing
Proper storage is an important part of brushes. You must store the brushes in a protective case before they are damaged, and your brushes should be dried before storage.
Shaping
If the brushes’ bristles lose shape, then you can’t get your required design, if these bristles are not in shape, dip them in warm water and reshape them with your fingertips. Wait for them to dry in their natural shape.
Tips for using Nail Art Brushes effectively
Start with basic design.
If you are a beginner, you should start with basic designs, which are easy to create, like dotting and strips, to learn how to handle the brush before creating intricate designs.
Use a thin layer of polish.
Always use a thin layer of polish, it is an easy way to manage the design when working with a brush. Then, we can create smooth designs.
Use consistent pressure
Keep the pressure consistent. Too much pressure can damage the brush’s bristles, especially when using a dotting tool to create a dot.
Use the gel for advanced technique
For intricate or detailed designs, use gel polish. It gives you more time to work on the design and does not dry as fast as regular polish.
Stabilize your hand
You create a design or painting by resting your hand on a flat surface.
Keep brushes clean during use
Keep the brush clean, especially when switching colors. After applying the polish, clean up the cuticles and edges with acetone.
Be patient
Nail art requires patience. It takes time to create an intricate design with nail art brushes.

How do you choose the right Nail Art Brushes?
You must choose the right brush for nail art to achieve the desired design. Different brushes are designed for specific effects.
For fine lines and detailed
Use a liner brush to create fine lines and a detailed brush for a thorough, intricate design.
For blending or ombre effect
A fan or flat brush works well to blend the colors to create an ombre and gradient effect.
Dotting and circle designs
To create a dotting design, you don’t need a brush or a dotting tool to create a perfect design or a dot-based design like a flower.
Texture effect
The fan brush is perfect for creating a textured look.
Strips and long line
Striping brush is to create strips, long lines, or geometric patterns in your nail art that give a refined look.
Which type of Nail Art Brushes are used for different nail art products?
For gel polish
Choosing the right brush is an important part of creating gel designs, it complements gel polish’s designs with unique properties. Synthetic brushes give you long-lasting effects and work well with gel polish’s thick consistency. For their long life, keep your gel brushes away from direct exposure to UV or LED lights. This can cause the gel polish on the brush to harden.
For regular nail polish
it’s an easy way to create nail art designs with regular nail polish for creating art use natural hair or synthetic brushes to achieve smooth results and a perfect design. Both work well, but synthetic brushes are easier to clean and more durable.
you can cleaned extra nail polish with nail remover or acetone. Natural bristles are soft and flexible but can wear down faster when exposed to acetone or regular polish remover.
For acrylics
You should choose the right brush for acrylic nails art to achieve a professional result, then you need specific tools and techniques. We need a round acrylic brush. It is typically made of synthetic material and is designed to handle the thickness of acrylic products.

Conclusion
Maintenance is essential for all nail art brushes. Regular cleaning, care and proper storage will extend their life and their work gently. If you want to create professional or artistic designs, you need different types of brushes for specific functions.


